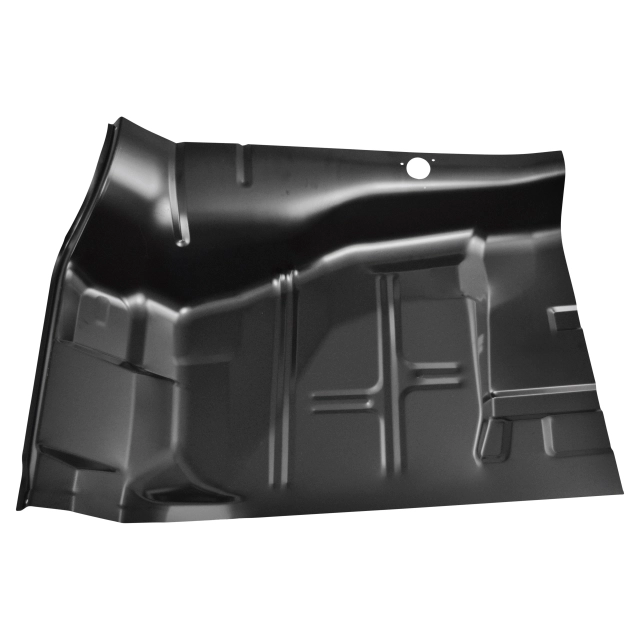
Front left-hand replacement floor pan section with integrated toe board for 1973–1977 GM A-Body passenger cars. This precision-formed steel panel restores structural integrity to the driver-side footwell, seals the cabin from road moisture and debris, and provides a factory-correct mounting surface for pedals and interior trim. Built for durability and ease of fitting, it simplifies restoration work by delivering accurate contours and a near-OE fit for reliable long-term performance.
Features:
- Fits 1973–1977 GM A-Body passenger cars (front left / driver side).
- Stamped, heavy-gauge steel panel formed to match factory contours for correct fit and alignment.
- Replaces corroded or damaged floor and toe board areas to restore structural integrity and safety.
- Pre-shaped toe board prevents water intrusion and road debris from entering the cabin.
- Designed for straightforward installation during restorations — primarily weld-in replacement for a durable repair.
- Improves vehicle longevity and resale value by addressing common rust points in the footwell area.
Installation / Application:
- Difficulty: 4/5
- Estimated time: 3-6 hours (typical, depending on corrosion and prep)
Instructions:
- Inspect the damaged area and compare to the replacement panel to confirm fit and needed scope of repair.
- Remove seats, carpet, trim, and any components that obstruct access to the left front floor and toe board area.
- Mark cut lines around the rusted or damaged metal, keeping as much good metal as possible; document holes, brackets, and attachment points.
- Cut out the damaged section using an angle grinder or spot-weld cutter; remove all rusted material and clean surrounding metal to bare, solid steel.
- Test-fit the new floor pan section and toe board, trimming as necessary for exact alignment with factory contours and adjoining panels.
- Clamp the panel in place and tack-weld at multiple points to verify fit; check alignment with seat mounts, pedal box, and door sills before completing welds.
- Finish-weld the panel using short, controlled welds to minimize distortion; grind welds smooth and restore original contours where required.
- Apply rust inhibitor to welded seams and the back side of the repair, then coat with primer and finish paint to match vehicle protection levels.
- Apply seam sealer to all joints and seams to prevent moisture intrusion, then reinstall removed components, carpet, and trim.
- Inspect the repair for fit, finish, and structural soundness; address any alignment or sealing issues before returning the vehicle to service.
Vehicle Fitment:
The Vehicle Fitment Guide is to be used as a general reference. The data has been provided by our suppliers and manufacturers and may contain errors or incorrect data. Always refer to a professional to verify correct fitment for your vehicle.
| Make |
Model |
Years |
| Buick |
Century |
1973 - 1977 |
| Buick |
Regal |
1973 - 1976 |
| Chevrolet |
El Camino |
1973 - 1977 |
| Chevrolet |
Laguna |
1973 - 1976 |
| Chevrolet |
Malibu |
1973 - 1977 |
| GMC |
Sprint |
1973 - 1977 |
| Oldsmobile |
Cutlass Supreme |
1973 - 1977 |
| Oldsmobile |
Cutlass |
1973 - 1975 |
| Oldsmobile |
Vista Cruiser |
1973 - 1975 |
| Pontiac |
Grand Prix |
1973 - 1976 |
| Pontiac |
LeMans |
1973 - 1976 |