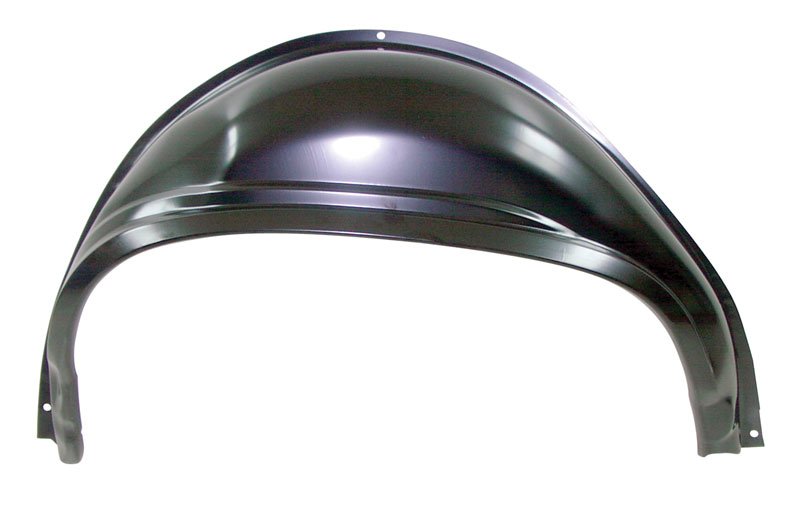
This rear outer left-hand wheel well (wheelhouse) is a direct replacement panel for classic Chevelle and El Camino restorations. Designed to repair rusted or damaged rear wheel openings on 1968–1969 Chevelle and 1968–1972 El Camino models, the panel restores structural integrity, seals the wheel opening against road splash and corrosion, and returns the factory contour for a proper finish. Built to OE-style dimensions and engineered for weld-in installation, it offers durability, reliable fitment, and a clean foundation for seam-sealing, priming, and painting during body restoration projects.
Features:
- Fits 1968–1969 Chevrolet Chevelle and 1968–1972 Chevrolet El Camino — rear outer left-hand wheel well (wheelhouse).
- Stamped OE-style gauge steel for accurate contours and long-term strength.
- Direct-fit weld-in replacement restores original body alignment and mounting locations.
- Seals the wheel opening to prevent water intrusion and future rust formation.
- Provides a factory-correct surface for seam sealer, primer, and paint during restorations.
- Ideal for collision repair, rust repair, and full-frame or body restoration projects.
Installation / Application:
- Difficulty: 4/5
- Estimated time: 3-6 hours (varies with experience and vehicle condition)
Instructions:
- Prepare vehicle: park on level surface, block wheels, lift and secure vehicle with jack stands, remove the rear wheel and any trim or interior panels that obstruct access to the wheelwell.
- Assess and mark: inspect the existing wheelhouse, mark the rusted or damaged area to be removed, and locate factory seams and welds.
- Remove old panel: cut out the damaged section using a grinder or spot-weld cutter, preserving any usable metal and avoiding damage to adjacent panels.
- Clean and prepare edges: grind back to solid metal, treat with rust inhibitor if necessary, and ensure mating flanges are straight and free of paint or corrosion.
- Test fit new panel: clamp the replacement panel into position, check alignment with surrounding body lines and mounting points, and trim or reshape as needed for a flush fit.
- Tack and weld: tack-weld the panel at several points, recheck fit, then complete stitch or plug welds along the seam in short intervals to minimize heat distortion.
- Grind welds and finish seams: blend welds with a grinder, use body hammer and dolly where necessary to true the panel, then apply seam sealer to all exposed joints.
- Prime and paint: apply appropriate primer and paint to protect the welded area from corrosion; finish as required for restoration-level appearance.
- Reassemble: reinstall any removed trim, interior panels, and the wheel; lower vehicle and perform final inspection for fit and finish.
Vehicle Fitment:
The Vehicle Fitment Guide is to be used as a general reference. The data has been provided by our suppliers and manufacturers and may contain errors or incorrect data. Always refer to a professional to verify correct fitment for your vehicle.
| Make |
Model |
Years |
| Chevrolet |
Chevelle |
1968 - 1969 |
| Chevrolet |
El Camino |
1968 - 1972 |
| GMC |
Sprint |
1971 - 1972 |